User Guide
Cerebro is a desktop application for tracking CS students’ internship applications, optimized for use via a Command Line Interface (CLI) while still having the benefits of a Graphical User Interface (GUI). If you can type fast, Cerebro can help you manage your internship application pipeline faster than traditional GUI apps or spreadsheets.
- Quick start
-
Features
- Viewing help :
help - Adding a company:
add - Listing all companies :
list - Editing a company :
edit - Locating companies by name:
find - Deleting a company :
delete - Updating application status:
status - Adding or editing remarks:
remark - Clearing all entries :
clear - Exiting the program :
exit - Saving the data
- Editing the data file
- Archiving data files
[coming in v2.0]
- Viewing help :
- FAQ
- Known issues
- Command summary
Quick start
-
Ensure you have Java
17or above installed in your Computer.
Mac users: Ensure you have the precise JDK version prescribed here. -
Download the latest
cerebro.jarfile from here. -
Copy the file to the folder you want to use as the home folder for Cerebro.
-
Open a command terminal,
cdinto the folder you put the jar file in, and use thejava -jar cerebro.jarcommand to run the application.
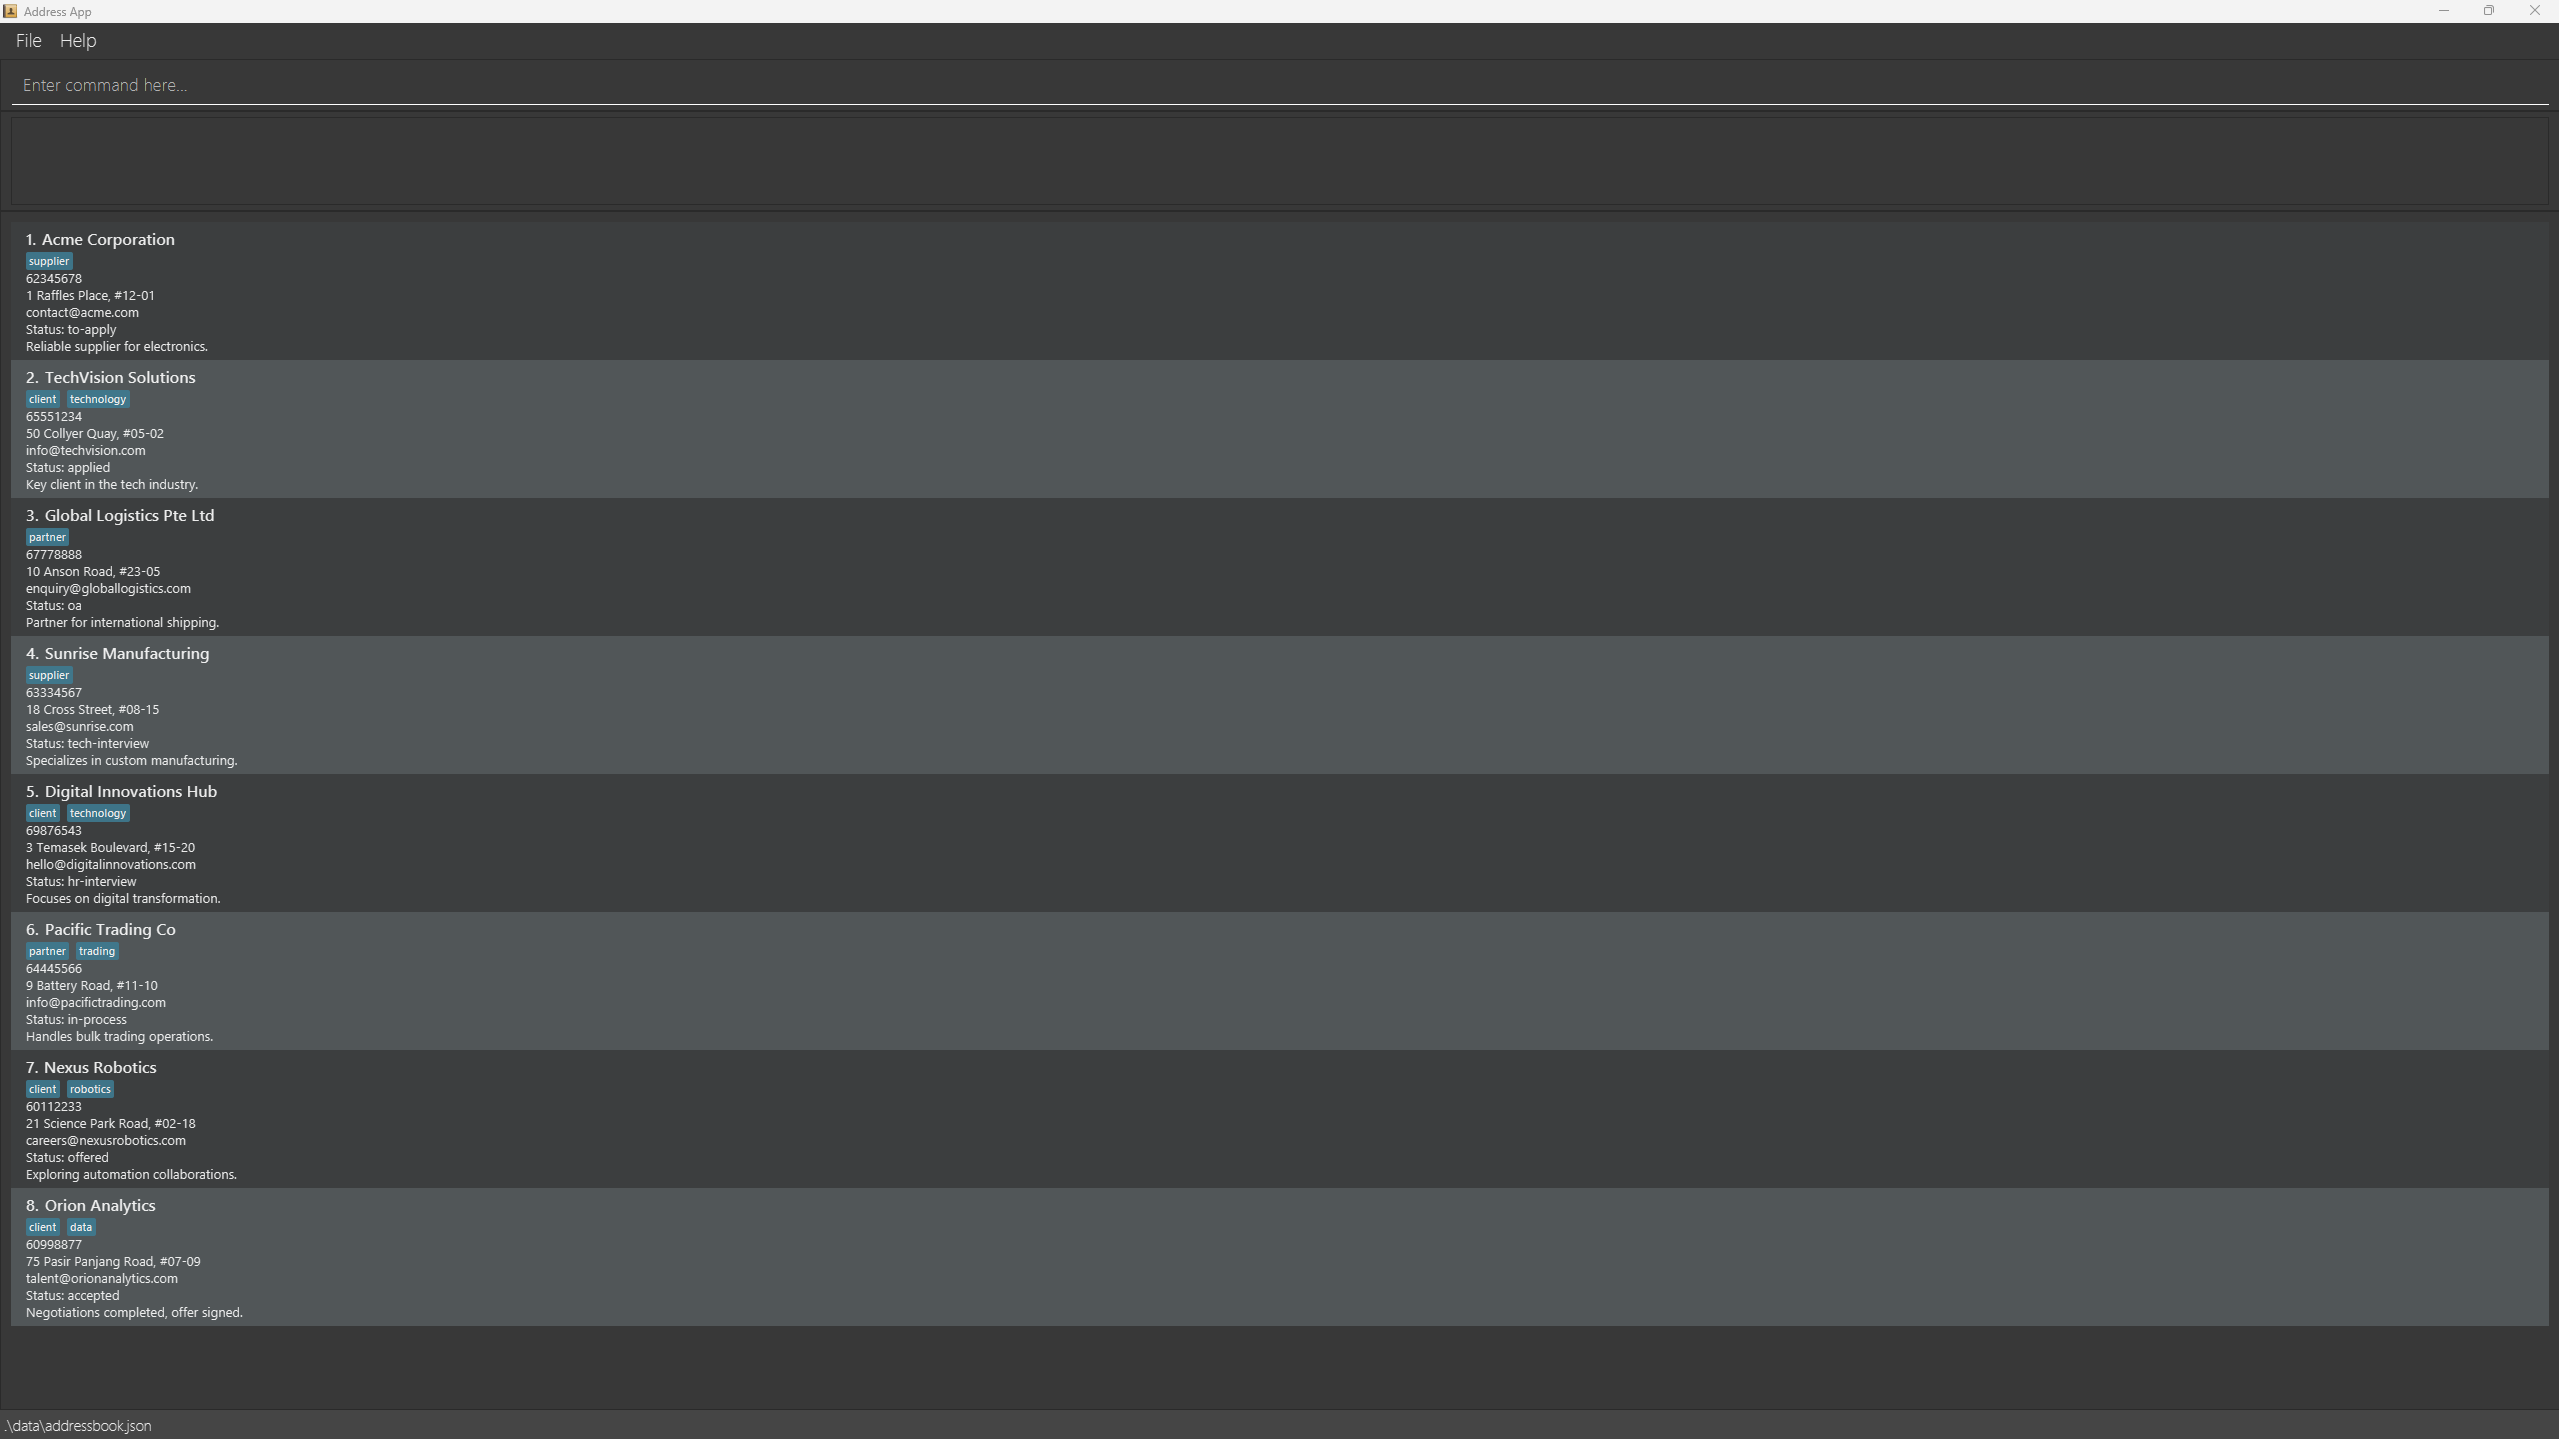
A GUI similar to the below should appear in a few seconds. Note how the app contains some sample data.
-
Type the command in the command box and press Enter to execute it. e.g. typing
helpand pressing Enter will open the help window.
Some example commands you can try:-
list: Lists all companies. -
add n/Google Inc: Adds a company namedGoogle Incto Cerebro (only name is required - other fields will use placeholder values). -
add n/Meta p/65432100 e/careers@meta.com a/1 Hacker Way, Menlo Park r/Great culture s/applied t/tech: Adds a company entry with multiple details (you can include any combination of optional fields). -
status 1 s/tech-interview: Updates the application status of the 1st company to “tech-interview”. -
delete 3: Deletes the 3rd company shown in the current list. -
clear: Deletes all companies. -
exit: Exits the app.
-
-
Refer to the Features below for details of each command.
Features
![]() Notes about the command format:
Notes about the command format:
-
Words in
UPPER_CASEare the parameters to be supplied by the user.
e.g. inadd n/NAME,NAMEis a parameter which can be used asadd n/John Doe. -
Items in square brackets are optional.
e.gn/NAME [t/TAG]can be used asn/John Doe t/friendor asn/John Doe. -
Items with
… after them can be used multiple times including zero times.
e.g.[t/TAG]…can be used ast/friend,t/friend t/familyetc. -
Parameters can be in any order.
e.g. if the command specifiesn/NAME p/PHONE_NUMBER,p/PHONE_NUMBER n/NAMEis also acceptable. -
Extraneous parameters for commands that do not take in parameters (such as
help,list,exitandclear) will be ignored.
e.g. if the command specifieshelp 123, it will be interpreted ashelp. -
If you are using a PDF version of this document, be careful when copying and pasting commands that span multiple lines as space characters surrounding line-breaks may be omitted when copied over to the application.
Viewing help : help
Shows a message explaining how to access the help page.

Format: help
Adding a company: add
Adds a company to Cerebro. You can include as many or as few details as you want - only the company name is required.
Format: add n/NAME [p/PHONE] [e/EMAIL] [a/ADDRESS] [r/REMARK] [s/STATUS] [t/TAG]...
- Only
NAMEis required - all other fields are optional - You can include any combination of optional fields based on the information you have
- Fields with placeholder values will be auto-filled for omitted optional fields
- Valid
STATUSvalues:to-apply,applied,oa,tech-interview,hr-interview,in-process,offered,accepted,rejected - If
s/STATUSis omitted, status defaults toto-apply - A company can have any number of tags (including 0)
edit command!
Examples:
-
add n/Google Inc- Creates entry with just the name and placeholder values for other fields -
add n/Meta p/65432100 e/careers@meta.com- Adds name, phone, and email only -
add n/Apple r/Great benefits s/applied- Adds name, remark, and status only -
add n/ByteDance p/12345678 e/recruit@bytedance.com a/Singapore Science Park r/Fast-growing s/tech-interview t/tech t/remote-friendly- Adds complete entry with all details
Listing all companies : list
Shows a list of all companies in Cerebro.
Format: list
- Displays all companies with their details
- Resets any active filters from previous
findcommands - Shows companies with their current index numbers
Editing a company : edit
Edits an existing company in Cerebro. Supports single edit, batch edit, and range edit.
Single edit format:
Format: edit INDEX [n/NAME] [p/PHONE] [e/EMAIL] [a/ADDRESS] [r/REMARK] [s/STATUS] [t/TAG]…
- Edits the company at the specified
INDEX - The index refers to the index number shown in the displayed company list
- The index must be a positive integer 1, 2, 3, …
- At least one of the optional fields must be provided
- Existing values will be updated to the input values
- When editing tags, the existing tags of the company will be removed (i.e., adding of tags is not cumulative)
- You can remove all the company’s tags by typing
t/without specifying any tags after it
Batch edit format:
Format: edit INDEX,INDEX,INDEX [fields to edit] or edit START-END [fields to edit]
- Edits multiple companies at once with the same changes
-
Comma-separated:
edit INDEX,INDEX,INDEX- Separate specific indices with commas (no spaces) -
Range:
edit START-END- Edits all companies from START to END index (inclusive) - Must have at least 1 field to edit
- Can only edit tags, status, or remarks for batch editing
- Useful for updating status or tags for multiple companies simultaneously
Valid STATUS values: to-apply, applied, oa, tech-interview, hr-interview, in-process, offered, accepted, rejected
Examples:
-
edit 1 p/91234567 e/careers@google.com- Edits the phone number and email address of the 1st company -
edit 2 n/Meta Platforms s/offered t/- Edits the name of the 2nd company to “Meta Platforms”, sets status to “offered”, and clears all existing tags -
edit 1,3,5 s/rejected- Sets the status of companies at indices 1, 3, and 5 to “rejected” -
edit 2-4 s/applied t/tech- Sets the status to “applied” and adds “tech” tag for companies at indices 2, 3, and 4
Locating companies by name: find
Finds companies whose names contain any of the given keywords.
Format: find KEYWORD [MORE_KEYWORDS]
- The search is case-insensitive (e.g.,
googlewill matchGoogle) - The order of the keywords does not matter (e.g.,
Google Metawill matchMeta Google) - Only the company name is searched
- Only full words will be matched (e.g.,
Googwill not matchGoogle) - Companies matching at least one keyword will be returned (i.e., OR search)
- e.g.,
Google Metawill return bothGoogle IncandMeta Platforms
- e.g.,
Examples:
-
find GooglereturnsGoogle IncandGoogle Singapore -
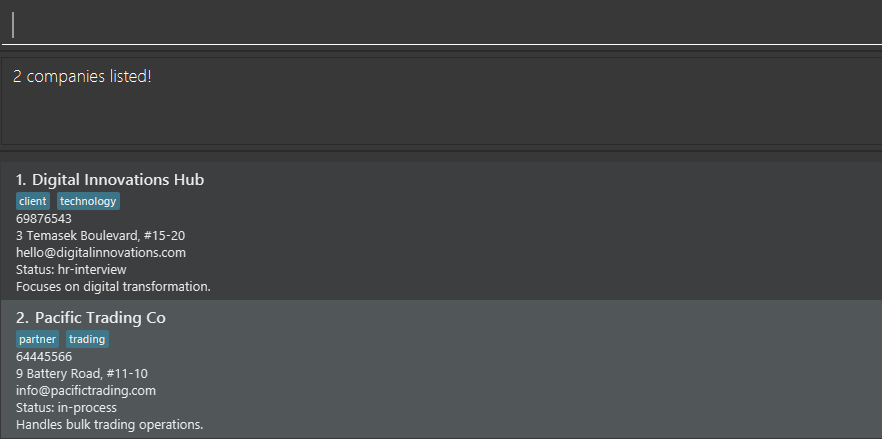
find digital pacificreturnsDigital Innovations Hub,Pacific Trading Co
Deleting a company : delete
Deletes one or more companies from Cerebro. Supports single deletion, batch deletion, and range deletion.
Format: delete INDEX [MORE_INDICES] or delete START-END
- Deletes the company(ies) at the specified index/indices
- The index refers to the index number shown in the displayed company list
- The index must be a positive integer 1, 2, 3, …
-
Single deletion:
delete INDEX- Deletes one company -
Batch deletion:
delete INDEX,INDEX,INDEX- Deletes multiple companies (separate with commas) -
Range deletion:
delete START-END- Deletes all companies from START to END index (inclusive) - Duplicate indices are ignored (first occurrence kept)
- All specified companies are deleted in a single operation
Examples:
-
delete 2- Deletes the 2nd company -
delete 1,3,5- Deletes the 1st, 3rd, and 5th companies -
delete 2-4- Deletes companies at indices 2, 3, and 4 -
listfollowed bydelete 2- Deletes the 2nd company in the full list -
find Googlefollowed bydelete 1- Deletes the 1st company in the filtered results
Updating application status: status
Updates the application status of a company to track your internship application progress.
Format: status INDEX s/STATUS
- Updates the status of the company at the specified
INDEX - The index refers to the index number shown in the displayed company list
- The index must be a positive integer 1, 2, 3, …
- Status is case-insensitive (e.g.,
APPLIEDandappliedboth work)
Valid STATUS values:
-
to-apply- Not yet applied (default for new entries) -
applied- Application submitted -
oa- Online Assessment stage -
tech-interview- Technical interview scheduled/in progress -
hr-interview- HR/behavioral interview -
in-process- General process stage -
offered- Internship offer received -
accepted- Offer accepted -
rejected- Application rejected
edit command to update status along with other fields.
Examples:
-
status 1 s/tech-interview- Updates the 1st company’s status to “tech-interview” -
status 3 s/rejected- Updates the 3rd company’s status to “rejected” -
status 5 s/offered- Updates the 5th company’s status to “offered”
Adding or editing remarks: remark
Adds, edits, or deletes remarks for a company. Remarks are useful for adding notes about the company or your application.
Format: remark INDEX r/[REMARK]
- Adds or updates the remark for the company at the specified
INDEX - The index refers to the index number shown in the displayed company list
- The index must be a positive integer 1, 2, 3, …
- To delete a remark, use
remark INDEX r/(leave the remark field empty) - Existing remark will be overwritten with the new remark
Examples:
-
remark 1 r/Great company culture, flexible hours- Adds/updates remark for the 1st company -
remark 2 r/Referral from John Doe- Adds/updates remark for the 2nd company -
remark 3 r/- Deletes the remark for the 3rd company
Clearing all entries : clear
Clears all companies from Cerebro.
Format: clear
Exiting the program : exit
Exits the program.
Format: exit
Saving the data
Cerebro data is saved in the hard disk automatically after any command that changes the data. There is no need to save manually.
Editing the data file
Cerebro data is saved automatically as a JSON file [JAR file location]/data/addressbook.json. Advanced users are welcome to update data directly by editing that data file.
Furthermore, certain edits can cause Cerebro to behave in unexpected ways (e.g., if a value entered is outside of the acceptable range). Therefore, edit the data file only if you are confident that you can update it correctly.
Archiving data files [coming in v2.0]
Details coming soon …
FAQ
Q: How do I transfer my data to another Computer?
A: Install Cerebro on the other computer and overwrite the empty data file it creates with the file that contains the data from your previous Cerebro home folder (located at [JAR file location]/data/addressbook.json).
Q: Can I edit company details directly in the JSON file?
A: Yes, advanced users can edit the addressbook.json file directly. However, ensure the format remains valid, or Cerebro will discard all data and start fresh. Always make a backup first!
Q: What happens if I add a company with the same name as an existing one?
A: Company names must be unique (case-insensitive). If you try to add a duplicate, Cerebro will reject the operation and display an error message.
Q: How do I track multiple internship positions at the same company?
A: You can use tags to differentiate positions (e.g., add n/Google SWE and add n/Google PM) or add position details in the remark field.
Q: Can I undo a delete or clear operation?
A: No, delete and clear operations are permanent. However, you can restore data by copying your backup addressbook.json file back to the data folder before restarting Cerebro.
Q: What’s the difference between the status and edit commands for updating application status?
A: Both can update status. The status command is a quick way to update only the status field, while edit allows you to update status along with other fields in a single command. Use whichever is more convenient!
Known issues
-
When using multiple screens, if you move the application to a secondary screen, and later switch to using only the primary screen, the GUI will open off-screen. The remedy is to delete the
preferences.jsonfile created by the application before running the application again. -
If you minimize the Help Window and then run the
helpcommand (or use theHelpmenu, or the keyboard shortcutF1) again, the original Help Window will remain minimized, and no new Help Window will appear. The remedy is to manually restore the minimized Help Window.
Command summary
| Action | Format | Examples |
|---|---|---|
| Add | add n/NAME [p/PHONE] [e/EMAIL] [a/ADDRESS] [r/REMARK] [s/STATUS] [t/TAG]… |
add n/Google Incadd n/Meta p/65432100 e/careers@meta.comadd n/Apple r/Great benefits s/applied
|
| List | list |
list |
| Edit (Single) | edit INDEX [n/NAME] [p/PHONE] [e/EMAIL] [a/ADDRESS] [r/REMARK] [s/STATUS] [t/TAG]… |
edit 2 n/Meta Platforms s/offered |
| Edit (Batch) | edit INDEX,INDEX,INDEX [fields] |
edit 1,3,5 s/rejected |
| Edit (Range) | edit START-END [fields] |
edit 2-4 s/applied t/tech |
| Find | find KEYWORD [MORE_KEYWORDS] |
find Google Meta |
| Delete (Single) | delete INDEX |
delete 3 |
| Delete (Batch) | delete INDEX [MORE_INDICES] |
delete 1 3 5 |
| Delete (Range) | delete START-END |
delete 2-4 |
| Status | status INDEX s/STATUS |
status 1 s/tech-interview |
| Remark | remark INDEX r/[REMARK] |
remark 1 r/Great company culture |
| Clear | clear |
clear |
| Help | help |
help |
| Exit | exit |
exit |
Valid Status Values
to-apply, applied, oa, tech-interview, hr-interview, in-process, offered, accepted, rejected